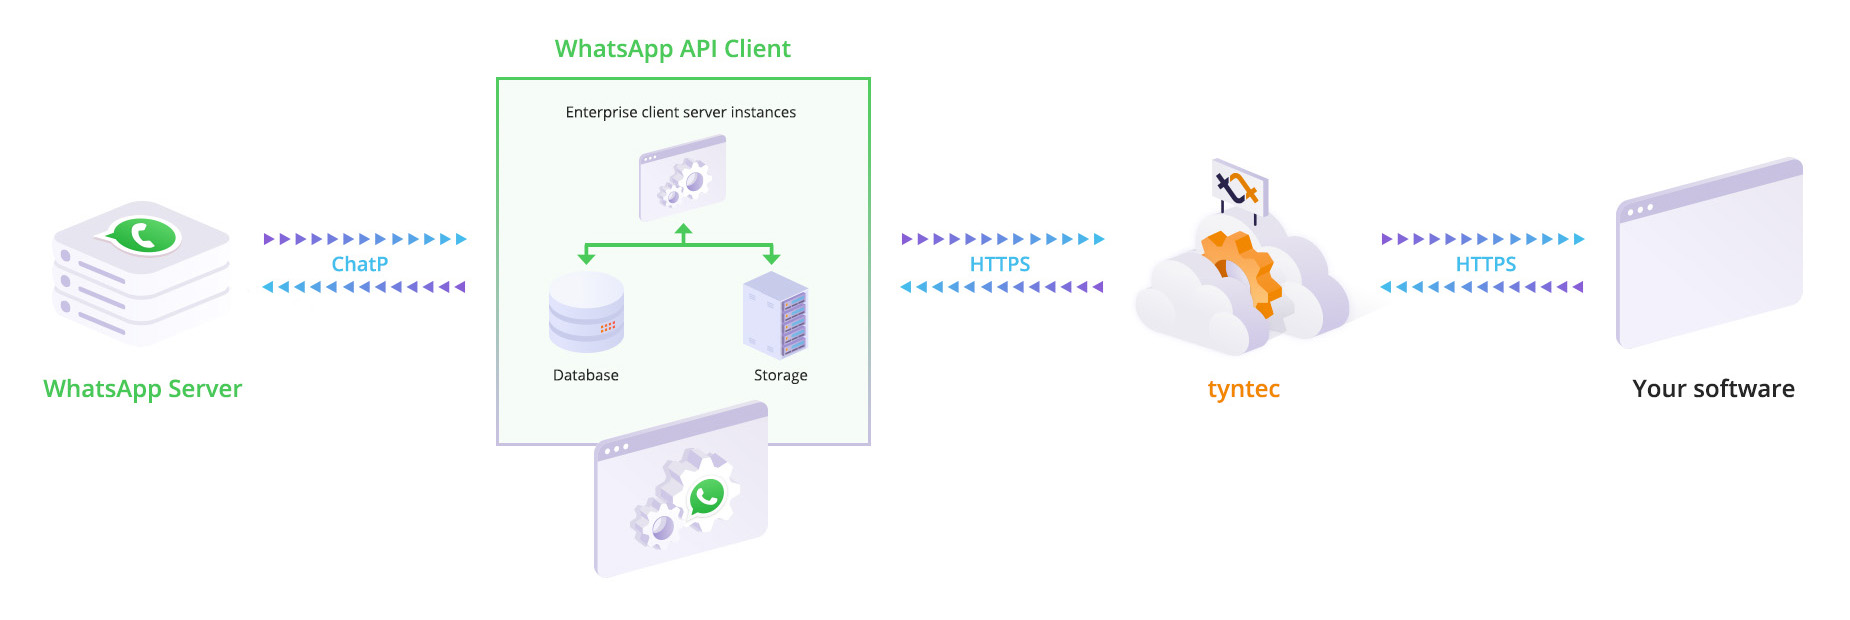
💡 What Is WhatsApp Cloud API?
WhatsApp Cloud API is the official WhatsApp API hosted by Meta Platforms.
It allows businesses to:
- Send & receive WhatsApp messages via API
- Build chatbots & auto replies
- Send notifications (orders, payments, OTPs)
- Integrate with CRM, ERP, billing & apps
👉 No third-party gateway required.
✅ What You Need Before Starting (Checklist)
Before setup, make sure you have:
- Facebook / Meta account
- Business email & documents
- Phone number (not linked to WhatsApp)
- Domain with HTTPS
- Server / hosting (PHP, Node, etc.)
🪜 STEP-BY-STEP: How to Get WhatsApp Cloud API (2026)
✅ STEP 1: Create Meta Business Manager
- Go to business.facebook.com
- Click Create Business
- Enter business name & details
- Complete business setup
👉 This is mandatory. No Business Manager = No API.
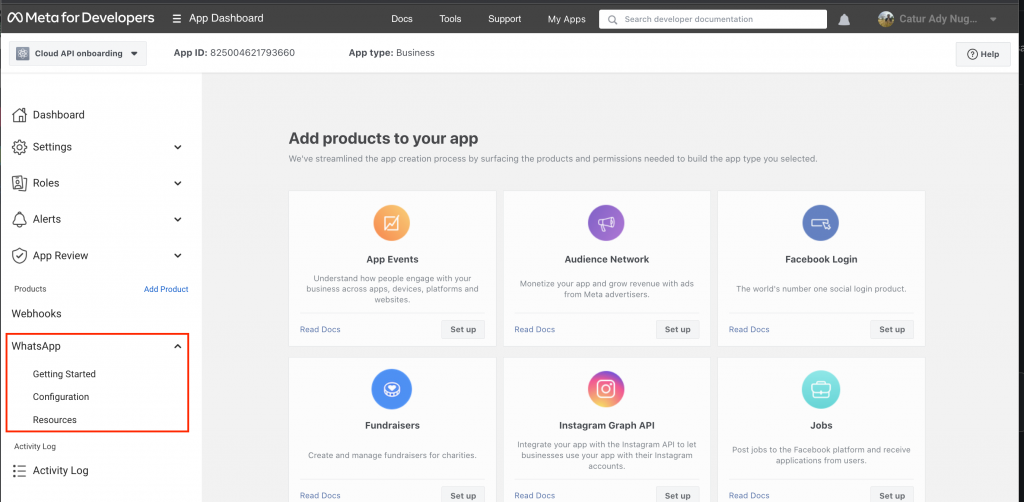
✅ STEP 2: Create a Meta App (Business Type)
- Visit developers.facebook.com
- Click Create App
- Choose Business app type
- Add WhatsApp product
- Select Cloud API
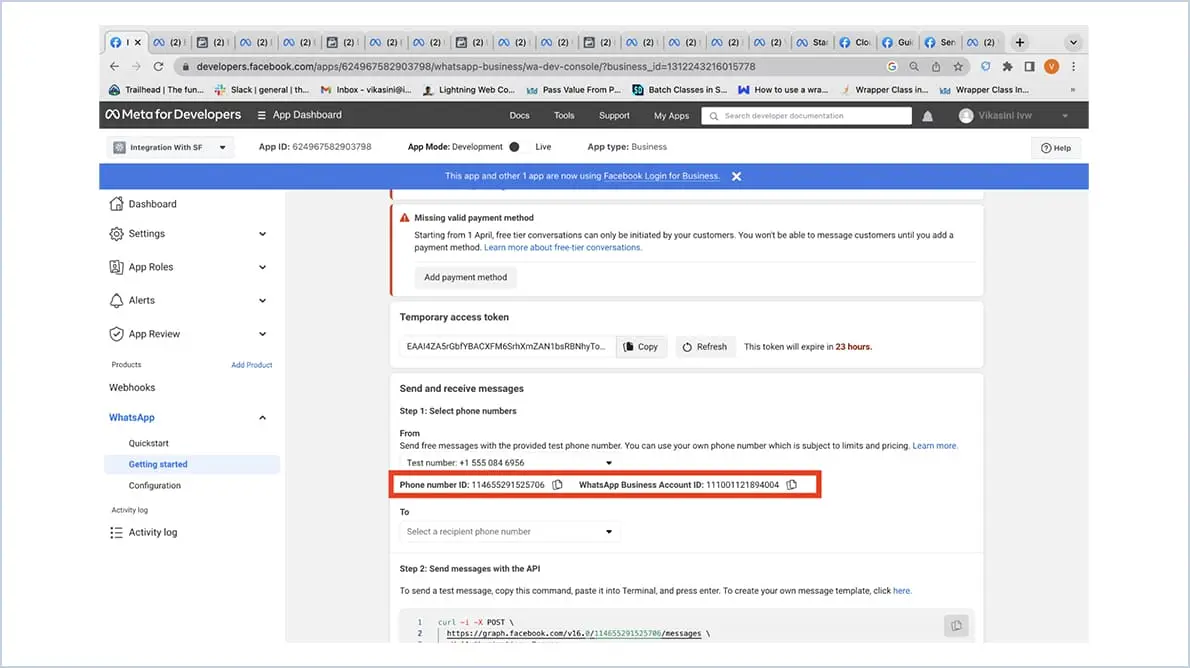
Meta will create:
- WhatsApp Business Account (WABA)
- Test phone number (⚠️ only for testing)

⚠️ IMPORTANT: Don’t Use Test Number for Live
Test number is only for trial.
For real messaging, you must add a real phone number.
✅ STEP 3: Add & Verify Real Phone Number
- Go to Business Settings
- Open WhatsApp Accounts
- Add a new phone number
- Verify via OTP
- Assign number to Cloud API
This is the most missed step.
✅ STEP 4: Add Billing / Payment Method (Fix Error 131042)
Without billing, messages will fail.
- Business Settings → Payments
- Add debit / credit card
- Enable billing for WhatsApp
Fixes:
❌ Billing eligibility error
❌ Message send failure
✅ STEP 5: Create System User & Permanent Access Token
Temporary tokens expire in 24 hours.
Production needs Permanent Token.
Steps:
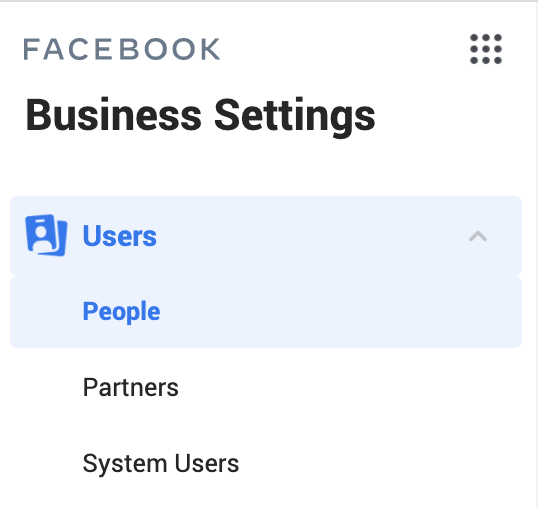
- Business Settings → System Users
- Create System User (Admin)
- Assign:
- WhatsApp Account
- App
- Generate token with permissions:
- whatsapp_business_messaging
- whatsapp_business_management
👉 This prevents sudden API failure.

✅ STEP 6: Setup Webhook (Receive Messages)
Webhook is needed to receive messages, delivery status, read receipts.
- Create webhook URL (HTTPS)
- Verify token
- Connect webhook in Meta dashboard
If verification fails → webhook code issue (very common).
✅ STEP 7: Create & Approve Message Templates
Templates are required for:
- Notifications
- Promotions
- Reminders
Steps:
- Create template in WhatsApp Manager
- Follow content policy
- Submit for approval
- Use template in API
✅ STEP 8: Send Your First WhatsApp Message
Once setup is complete:
- Use API endpoint
- Use permanent token
- Use phone number ID
- Send test message
🎉 WhatsApp Cloud API is LIVE.
⚠️ Common Mistakes to Avoid (2026)
❌ Using test number in production
❌ Skipping billing setup
❌ Using temporary access token
❌ Wrong permissions
❌ Webhook not HTTPS
❌ Poor template content
90% failures come from setup mistakes, not code.
🏢 How Anjok Technologies Helps
Anjok Technologies provides end-to-end WhatsApp Cloud API setup:
✔ Business Manager setup
✔ WhatsApp Cloud API activation
✔ Billing & eligibility fixing
✔ Permanent token setup
✔ Webhook configuration
✔ Template approval support
✔ PHP / Laravel / CRM integration
✔ White-label WhatsApp platforms
We don’t just guide — we implement.
📞 Contact Anjok Technologies
📱 +91 80729 70517
🌐 anjoktechnologies.in
👉 Ask for WhatsApp Cloud API Demo (2026 Ready)